

Is Your Virtual Memory Running Low? Here’s How to Resolve the Issue!
Problems with computer memory can lead to gradual performance degradation. Discover how to optimize your virtual memory size to enhance your computer’s speed.
- As your Windows 10 or Windows 11 system ages, it can slow down due to outdated hardware and limited memory.
- Virtual memory, which supplements your RAM when it’s running low, can impact system performance.
- Increasing your virtual memory size can mitigate slowdown issues, but upgrading your RAM is the optimal solution for enhancing system speed and performance.
If you’ve noticed your Windows 10 or Windows 11 installation gradually losing its snappiness, you’re not alone. The ever-increasing hardware demands of popular applications can take a toll on your aging hardware.
In many cases, the culprit behind the slowdown is simple: insufficient memory. When your system lacks adequate memory, it can grind to a halt when trying to run multiple resource-intensive programs.
Let’s explore how you can adjust your virtual memory settings in Windows 10 or Windows 11 to tackle these issues effectively.
What Is Virtual Memory?
Your computer possesses two distinct types of memory: a hard drive or solid-state drive, and RAM.
Your hard drive is the home of your operating system, as well as the repository for your photos, music, games, documents, and more. In contrast, your RAM stores data specific to the programs you’re currently using. While it’s much faster than your hard drive, it’s also more volatile, serving as a transient workspace for the programs and files you have open.
Now, let’s delve into the concept of virtual memory.
When your system exhausts all available RAM, it turns to virtual memory, also known as a swap or paging file, to offer a temporary expansion. Virtual memory effectively leverages a portion of your hard drive’s memory to augment your available RAM. This virtual memory proves to be a valuable resource, enabling your system to handle a greater volume of data for running programs than would otherwise be possible.
However, it’s important to note that your hard drive memory (or even a faster solid-state drive) is considerably slower compared to your high-speed RAM. Consequently, this can have an adverse impact on your system’s performance.
When your system’s available memory becomes scarce, the paging file comes into play. Some of the data residing in RAM is relocated to the paging file, creating additional room for high-speed memory operations.
Experiencing Low Virtual Memory
If you find yourself running low on virtual memory, you may encounter the following notification:
“Your system is currently low on virtual memory. Windows is in the process of expanding the size of your virtual memory paging file. During this operation, certain applications may experience memory request rejections. For further assistance, please refer to the help resources.”
To address this issue, manually increasing your paging file size is recommended, as indicated by the error message. Initially, Windows configures the virtual memory paging file to match the amount of installed RAM. The paging file should ideally be set at a minimum of 1.5 times and a maximum of three times your physical RAM.
You can calculate the appropriate paging file size using the following method. For instance, a system with 4GB of RAM would require a minimum size of 6,144MB (1GB of RAM x Installed RAM x Minimum), while the maximum would be 12,288MB (1GB of RAM x Installed RAM x Maximum).
However, it’s important to exercise caution when setting a paging file size at the upper limit of 12GB, as such a large paging file can lead to system instability. It’s crucial to remember that the paging file is a temporary solution and should not be relied upon as a substitute for increasing your physical RAM.
How to Adjust Your Virtual Memory
The logical question to ask is, “How much virtual memory do I need?” Here’s a step-by-step guide on how to increase your paging file size and resolve the virtual memory error message:
- Navigate to Control Panel > System and Security > System.
- Select “Advanced System Settings” to access your System Properties, and open the Advanced tab.
- Under the “Performance” section, click “Settings.” Then, go to the Advanced tab once more.
- Within the “Virtual memory” section, choose “Change.” This is where you can modify your Virtual Memory settings.
For Windows 11 users, a more direct route to Advanced System Settings can be followed:
- Press the Windows key + I to open the Settings app.
- Head to “System” > “About.”
- Select “Advanced system settings.”
- Under “Performance,” click “Settings.” Then, open the Advanced tab and choose “Change” in the “Virtual memory” section. Here, you can adjust your Virtual Memory settings.

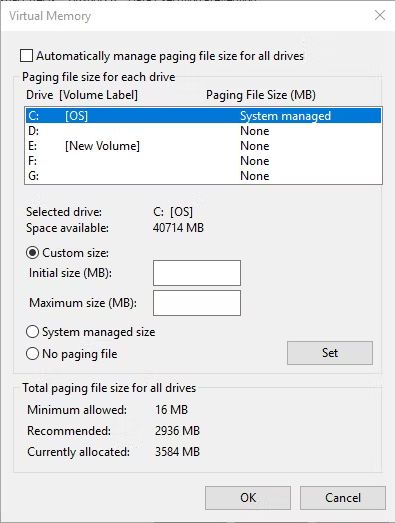
For both Windows 10 and Windows 11, the default setting is to have the system automatically manage the paging file size for all drives. To activate the currently disabled section below, simply deselect this option. Next, choose the drive for which you wish to adjust the paging file size, typically your C: drive.
Next, choose the “Custom size” option. Specify the maximum size you desire for your paging file, taking into account the recommended size for your specific system. Keep in mind that Windows imposes a limit on the paging file size, capping it at three times the amount of your installed RAM. This limitation is in place to maintain system stability. Additionally, set the initial size to match the currently allocated size, which can be found below.
Now, choose “Custom size” and specify the maximum size you desire for your paging file, adhering to the recommended size for your system. Keep in mind that Windows enforces a limit on the paging file size, which should not exceed three times the size of your installed RAM to maintain system stability. Set the initial size to match the currently allocated size (located below).
Is Manually Clearing Virtual Memory Necessary?
Expanding virtual memory on Windows is one thing, but what about maintaining it once it’s in use?
It’s typically not advisable to manually clear your virtual memory on Windows. If your virtual memory settings are configured as “System Managed,” that’s precisely what Windows is designed to do. Periodically, Windows automatically manages your virtual memory by removing older, unnecessary data. If you frequently clear your virtual memory, you may disrupt the functionality of programs relying on it or experience quicker memory depletion—essentially defeating the purpose of utilizing the paging file.
In summary, there’s generally no need to manually clear virtual memory since Windows efficiently handles its use and allocation. However, if you still wish to directly manage your paging file, here’s how to reset your virtual memory.
Other Methods to Enhance Virtual Memory
If your system continues to operate sluggishly despite adjusting the paging file size, consider upgrading your RAM.
Increasing your RAM is the most effective way to augment virtual memory, as it enhances the overall memory available to your system. This not only mitigates virtual memory-related issues but can also boost system performance.

Upgrading RAM offers several advantages over relying on virtual memory:
- Enhanced system performance: RAM is significantly faster than virtual memory stored on a hard drive, allowing for quicker data access.
- Improved multitasking: With more RAM, you can comfortably run multiple resource-intensive applications concurrently, whereas virtual memory has its limitations.
- Increased stability: Large page files can sometimes lead to system instability, but adding more RAM reduces reliance on virtual memory.
- Cost-effectiveness: RAM upgrades are a one-time expense that can prolong the life of an older system, saving valuable hard drive space over time compared to virtual memory usage.
Optimal Virtual Memory Settings
For the most part, it’s advisable to leave your virtual memory settings as they are. Windows 10 and Windows 11 adeptly manage both physical and virtual memory. If you consistently encounter the paging file memory limit, the most practical solution is upgrading your RAM, which can make a substantial difference in system performance, particularly for older systems.
Performance Programs to Consider
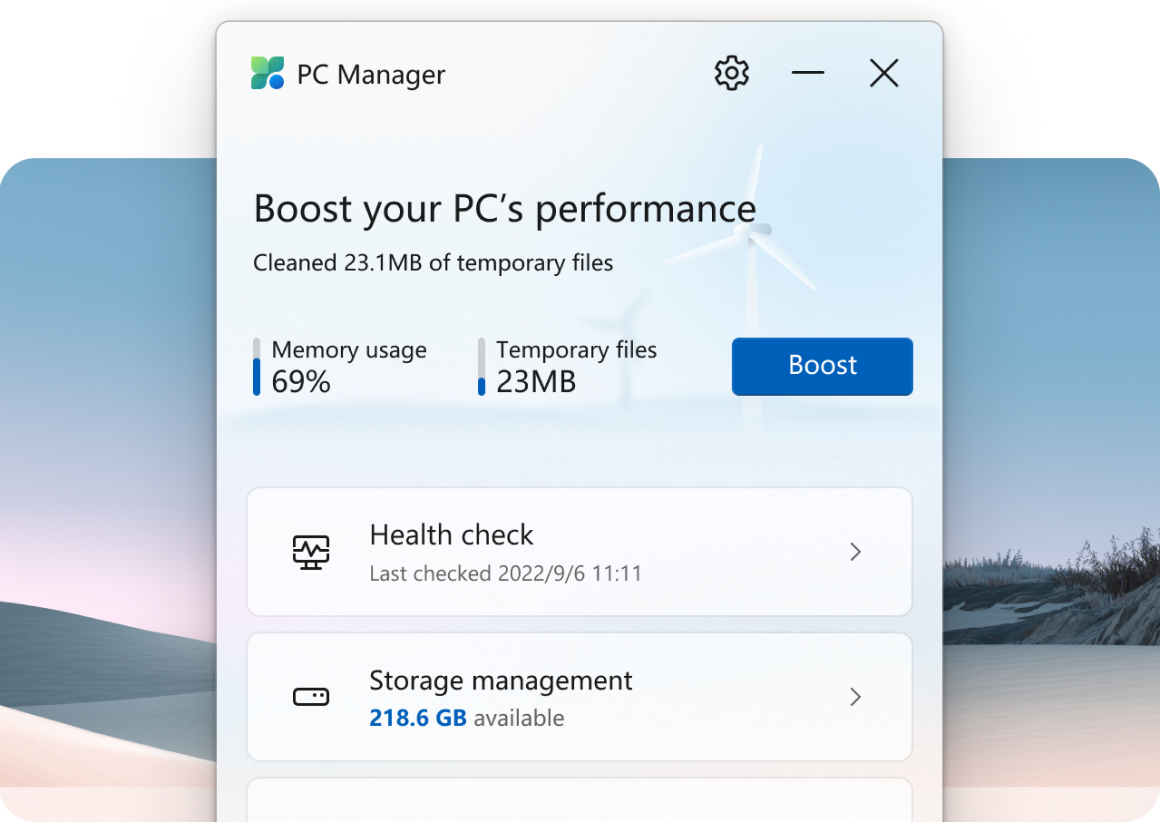
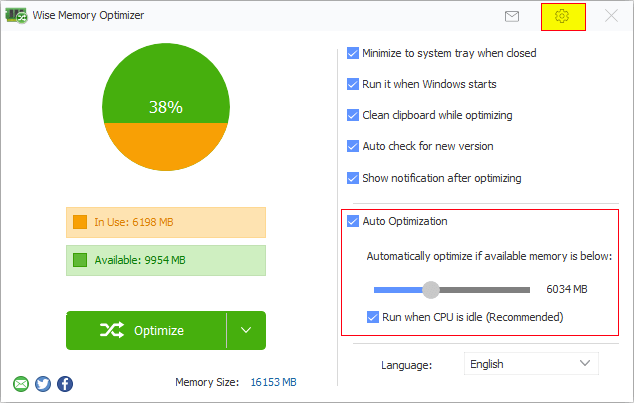
Lastly, there are two programs that do a great job of clearing out virtual memory that we trust: Microsoft PC Manager and Wize Memory Optimizer. Both do a fantastic job of performing one-click optimizing or even setting auto-release of empty stand-by memory.
Microsoft PC Manager is a cutting-edge software solution that has taken the world of PC optimization and security to the next level. Developed by tech giant Microsoft, this powerful tool offers users a comprehensive suite of features, including system maintenance, real-time threat protection, and performance optimization, all in one convenient package. With a user-friendly interface and robust capabilities, Microsoft PC Manager is poised to become an essential utility for Windows users, ensuring their devices run smoothly and remain safeguarded against evolving digital threats. Whether you’re looking to streamline your PC’s performance or fortify its security, Microsoft PC Manager is a compelling choice for modern computer users.
Wize Memory Optimizer is a powerful and efficient software solution designed to enhance the performance of your computer by optimizing its memory usage. With its user-friendly interface and intelligent algorithms, Wize Memory Optimizer helps users reclaim wasted RAM space, reduce system slowdowns, and improve overall system responsiveness. Whether you’re a casual user looking to boost your computer’s performance or a power user seeking to maximize your PC’s capabilities, Wize Memory Optimizer offers a simple yet effective way to ensure your system runs smoothly, making it an invaluable tool for anyone looking to get the most out of their computer.


0 Comments