

Are you ready to boost your productivity on Windows? Harness the power of split screen mode to multitask like a pro! Split screen mode allows you to view and work with two applications side by side, making it easier to manage multiple tasks simultaneously. Follow these simple steps to make the most of this handy feature:
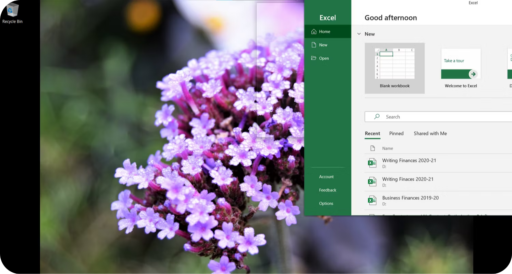
- Open Your Applications: Start by launching the applications you want to use in split screen mode. These could be programs like a web browser, document editor, or spreadsheet software.
- Snap Windows: Once your applications are open, click and hold the title bar of the first application window. Drag it to the left or right side of your screen until you see a transparent outline appear.
- Release to Snap: Release the mouse button to snap the window into place. You’ll notice that the window takes up half of your screen space.
- Select Another Application: Now, open the second application you want to use alongside the first one. Click and drag its title bar to the opposite side of the screen. Release the mouse button to snap it into place.
- Adjust Window Sizes: If needed, you can adjust the size of each window by clicking and dragging the divider between them. This allows you to customize the layout based on your preferences and the tasks you’re working on.
- Enjoy Dual Productivity: Congratulations! You’re now using split screen mode in Windows. Take advantage of this setup to streamline your workflow, compare information, or reference multiple documents without constantly switching between windows.
With split screen mode, multitasking on Windows has never been easier. Experiment with different application combinations and find the setup that works best for you. Happy multitasking!
There are two methods for splitting your screen on Windows: manual using your mouse and through a keyboard shortcut. While the manual approach offers more customization options, each method has its own benefits. Ultimately, the choice between them depends on your specific needs for splitting your screen.
- Splitting Your Windows Screen with Mouse Control
- Creating a Split Screen on Your Desktop
To initiate a split screen setup on your desktop, ensure that you have a minimum of two active windows. For instance, imagine you’re awaiting an important email while simultaneously working on a spreadsheet. Instead of toggling between applications, opt to display both windows side by side. This configuration enables you to promptly notice when the email arrives.
Dividing Your Windows Screen
Begin by ensuring one window is resized to a movable size. Click on its title bar and drag it towards either the right or left edge of the screen until the mouse cursor disappears.

When you release the cursor, an outline will briefly flash, indicating where the window will be positioned. Release the cursor, and the window will automatically fill that space.
Windows’s Snap Assist feature will promptly present options to fill the other half of the screen with apps that were open when you initiated the process. Simply click on the desired window to accompany the first one, and it will occupy the remaining space.

If you prefer a different selection of windows for split-screen viewing, there’s no need to close anything. Simply open the new window you wish to incorporate and position it over the window you want to replace.
Expanding Your Split Screen Options
Windows offers the flexibility to split the screen in multiple ways, accommodating up to four windows. Naturally, this functionality is more effective on larger screens. If you’re unsure about monitor specifications, refer to our guide to deciphering monitor specs for insights on screen size and resolution.
The process remains the same, except you’ll drag each window to a corner of your screen instead of the side. As before, an outline will indicate the portion of the screen each window will occupy.
Snap Assist activates under two scenarios:
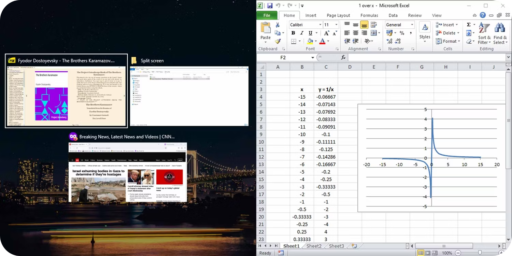
1. If your initial two windows occupy either the right or left side of the screen, Snap Assist will automatically populate the remaining half with a single window, resulting in three windows displayed simultaneously.
2. If you’ve positioned three windows, each occupying a quarter of the screen, leaving only one-quarter empty, Snap Assist intervenes to assist you in selecting the fourth window to complete your split-screen arrangement.
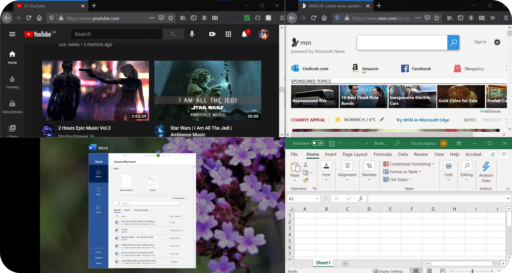
Note that in a three-window layout, one program will appear larger than the others, while all windows will be the same size in a four-window arrangement. Therefore, it’s essential to carefully choose your windows and their placement.
How to Split Your Screen on Windows Using Keyboard Shortcuts
Discover one of Windows’ handy keyboard shortcuts for splitting your screen more efficiently.
Split Your Screen Instantly
With at least two windows open, ensure the one you wish to move is active. Then, press the Windows Key + Left/Right Arrow.
Once your primary window snaps into place, Snap Assist activates, presenting you with options to occupy the remaining half of the screen. Use the arrow keys to navigate and press Enter to confirm your selection.
To create a split screen with three or four windows using your keyboard, you’ll need to follow some additional steps involving your arrow keys. For example, you can place a window in the top right corner of your screen by pressing the Windows Key + Up and Right Arrow Keys simultaneously, or by using Windows Key + Up followed by Windows Key + Right. The same principle applies to other quadrants of your Windows display.
Once you’ve positioned a window, it will remain in place since Snap Assist hasn’t activated yet. Next, switch to another window and use the arrow key diagonal method to position it, filling the remaining half (left or right) of the screen. This allows you to efficiently set up a multi-window split screen configuration.

Once Snap Assist activates, it will present you with choices to occupy the remaining half of the screen. You can select from these options to create a three-window split screen, or alternatively, proceed with the arrow key diagonal method to fill your screen with four windows.
Turning off Windows Snap Assist
While Windows Snap Assist can be handy, it might not always be necessary. If you find it obstructive, you can easily disable the feature. Just press Windows Key + I to open Settings, then navigate to “Multitasking” and toggle off “Snap windows.”

The purpose of this convenient tool is to streamline navigation between different windows, ensuring a seamless user experience. Additionally, Windows split screen functionality seamlessly extends to one or multiple attached monitors. You can effortlessly move your split-screen windows across all your monitors using any of the methods outlined above.


0 Comments